Saturday, November 8, 2008

Braised Cabbage

I have to give the credit for this one to Molly Stevens, the author of All about Braising. The colder months are all about stews and soups and pot roasts, and All about Braising is one if the best books out there for one-pot meals that make your whole house smell like Northern Italy. Out of the many recipes in the book, this is one of our favorites, which is strange because there is no meat involved.

So here's what you need: One head of cabbage, a small yellow onion, a couple of carrots, salt, pepper, chili flakes, and about a quarter cup of chicken stock (or water if you're lame). You'll also need some sort of baking dish that can be put under the broiler. You're not supposed to use Pyrex under the broiler- a fact I just discovered- but I do anyway. But you shouldn't. Or if you do you shouldn't blame me if your dish explodes and your house burns down or whatever.

A whole head of cabbage will fill two 9x13 Pyrex dishes, and brother, that adds up to some cheap eating. Heat your oven to 325.

First just divide the cabbage into some thick wedges. Try and keep the core attached at the bottom of the wedges so it'll all stay together. This is especially important when it comes time in the middle of the cooking to flip everything over. Peel and chop your carrots (I always slice mine on the bias so they'll look cooler), and cut your onion into thin ribbons (cut root to stem, turn them to the flat side and slice in the sagital plane. Like that head in the lab.).

Nestle all your onions and carrots into the dish and set the cabbage on top of that. Give it all a good dousing in olive oil and sprinkle with salt and pepper and the chili flakes. Pour in the quarter cup of chicken stock (or water). You need that much stock/water per baking dish, by the way. I had some homemade stock on hand for today, but when I don't I use chicken soup base, which you just mix with water. It's a lot more conveinent than buying the boxed stuff.

Now all you have to do is tightly seal some foil around your baking dish(es), and throw them in your now preheated oven. Set a timer for an hour, and go weave a basket.

After an hour, flip everything over. Try and keep them together, but a little messiness will ensue no matter how hard you try. Back into the oven for another hour, then take the foil off and blast it all under the broiler until you start getting some good browning in spots.

Wednesday, October 29, 2008

Yeah, That's Right, I Said Cauliflower!

No really, cauliflower can be mind-blowingly (how's that for an adverb?) delicious. The key is to be patient. Well, that and butter. Lots of butter. To start, cut up a whole head of cauliflower- I just cut the core out and then make half inch "steaks" out of it- you'll get some big pieces that stay together and quite a bit of little florets that will become your favorite part later when they get all caramelized and crispy and oh so slightly sweet. You need a pan that's large enough to get plenty of browning going on, and that pan needs a lid for a little bit of steaming. Place the aforementioned pan on the stove top and get it medium hot. Now add about three tablespoons of butter and let it melt until it stops foaming. Add the cauliflower. Throw a pinch of salt (kosher, please) on top. And then hurry up and wait. It'll look like this at first:
Leave it alone for awhile- it takes time for the florets on the bottom to start browning at first. Toward the end you'll have to be more vigilant. After about ten long minutes, give it a stir. Then wait some more. Repeat. Once you've got a fairly browned bunch of cauliflower put the lid on top and let it steam for about five more minutes. The following is the progression you're looking for:
The best part: the only calories to be found here are in the butter. Well, almost. The cauliflower is so low-calorie it almost takes your body more calories to digest it than what it actually gets from it. Taste for salt, probably add some pepper, and dig in. And you should click on the above picture, because it's just so pretty in that bowl, all golden brown and all.

Wednesday, October 22, 2008

Tastes Like Chicken, but Better

This tastes like chicken because it is. But I figure everyone needs an extra way to cook up some yard bird, and this is one of my favorites. Cara's brother learned this recipe in culinary school, and I now pass it along to you. You'll need some butter, a shallot, some shrooms, a couple of tablespoons of flour, a cup of Chardonnay (which is a dry white wine for the uninitiated), a cup of heavy cream, and two cups of chicken stock. The stuff that comes from a box is fine.

Funny story: we used to attend a church in Houston where everyone brought a pot luck dish of some sort for after the service. It was really cool- everyone brought their A-game, and there were quite a few really good cooks. I usually brought something totally out of the ordinary (for them) like curries or some other Indian fare.

One day I brought this, and I thought a fight was gonna break out over who got to lick the pan. I became a far bigger rock star that day at church than I ever had been when I was actually playing in a rock band.

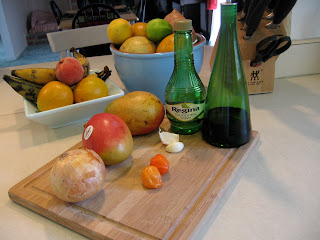
The next Sunday a lady asked me for the recipe, and when I told her there was, gasp, white wine in it she really had no idea how to react. She said something along the lines of, "I couldn't buy wine- I wouldn't feel right about going down that aisle at the store." To which I replied something incredibly witty, but can no longer remember. But I'm here to tell all you fellow Calvinist Credo-Baptists that read this site (all three of you. Or less)- there's flavor in those there bottles. And you don't have to drink them. Although I do recommend it. But that's just me. I used the following for this post, but use whatever you like. You know, if you like wine. Or even if you don't, cause it just ain't French without both butter and wine.And while I'm showing you pictures of stuff, this is a shallot, which you absolutely must use:Those are mushrooms in behind it. And that's our sweet new cutting board from Kohl's underneath it. Again, in case you care.

Anyway, throw some butter in a pan and get it medium hot. After seasoning with salt and pepper, dredge your boneless, skinless, usually flavorless chicken breasts though the flour. You just want a light coat so they'll get the right color. The flour also becomes fond in the pan which adds to the flavor of the sauce, and this sauce makes church ladies fight if you do it right. And that's a sight to behold. They'll look like this:
After tossing them in the butter you must leave them alone. You want them to be golden brown and delicious. You are not allowed to touch them for a long time. You can probably cook up to six chicken breasts this way and still have enough sauce, but you can always add more of the sauce ingredients to make more if you've got a lot of starving people camped out at your house, sucking the life's blood out of you. After the chicken has firmed up nicely you have my permission to flip them. The first side should look like this:
When the second side looks like the first, take them out and start making the sauce. The sauce, my friends, is what writes the songs that makes the whole world sing.

Add your diced up shallots and mushrooms to the pan and cook them down for 3-5 minutes. Then add one cup of the wine. Scrape the brown bits out of the pan while the wine is reducing (and thus concentrating the flavor). It'll take a few minutes, but it's where you want it when it looks like a thin coat of liquid in the pan. Like this:Now add the chicken stock, and reduce it down to about a quarter of what you started with. Then add the cream (turn the heat down a touch) and simmer it for about five minutes- it'll start to thicken up nicely. Add the chicken back to the pan to warm though. Then spoon some sauce on a serving plate and put the chicken on top of the puddle. Take a picture:Add something green to the occasion and open something to drink. Your choice!

Thursday, October 9, 2008

Cuttin' up a Chicken

Have you ever paid attention to exactly how cheap whole chickens are when they go on sale? They're, like, practically free. Or at least four bucks. And honestly, once you get good at cutting them up, you'll be blown away at how much cheaper it is to do it yourself, and how much better the pieces turn out. Boneless, skinless chicken breasts from the store look like hacked-up roadkill compared to what you can do. Plus, at home you get to keep the skin if you want, and I often do if I'm grilling them.

Instead of taking a thousand pictures and the usual witty remarks in how-to format, I made a video. The camera turned itself off right as I was about to tell you to start making homemade chicken stock with the carcass. It's funny saying "carcass" on a food post. Carcass!


Saturday, August 2, 2008

Plantains- A Tex-Carib Staple

I picked up a tip in Haiti about frying plantains that has made all the difference. And with the Tex-Carib policy of spending the equivalent of a month's salary in the afore-mentioned country on fancy-pants oil for frying, I think I now make plantains better than plain ol' Carib, without the Tex.

I'd attempted the nanner-lookin' fruit a few times in the past, but they were always hit or miss, heavy on the miss. And I can admit that now that I've cracked the code.

During our trip to see the boys the staff at the guest house cooked up plantains twice, but the first time I missed out. I was having some issues. You know. Third world issues.

Cara said the second batch wasn't nearly as good as the first. Of course. You should've been here an hour ago! I also missed the roasted goat, which I was really looking forward to trying.

But back to the task at hand- avoiding studying for boards.

Step One: Selection

I'm fairly certain that other than the fact that I pretty much just make up all this stuff as I go along, that the reason I had so little success with plantains in the past was the fact that I didn't know when to cook them. Figuring out when they are supposed to be ripe on the internet wasn't helping because there is no article on Wikipedia on the subject, and that's the only source I trust. I can now spare you that misery:I bought four nice plantains a week ago and today was finally the day when it was time to get down to business. So what you see pictured here to even darker is the target ripeness zone. If you find yourself with a nearly black plantain, don't throw it away. Give it to me.

Plantains, when not ripe, are starchy fruit-taters, but they're not at all sweet. If you're making plantain chips like the one they serve at the local dive Crabby Joe's, then this is what you want. If, however, you're looking to make a sweet Tex-Carib delight, wait it out. Because as they ripen they sweeten into something that would make Crabby Joe slap his momma.

Step Two: Cut the ends off.

I think that says it all, but here's a picture. Just in case.
Step Two and a Half: Peel It.

You'll want to make long scores down the side and peel off the sides. I forgot to mention this when I started this post, and I don't feel like changing all the numbers.

Step Three- Cut it Up

I prefer to cut things on the bias. That is to say, like this:
Step Four: Fry, Part (A)


The tip I picked up is this: like a well made fry, you've gotta double-fry plantains.Just get 'em mostly golden. Like this:Then let them cool off for a few minutes while you enjoy a beverage. Then smash them a little, like this:Then fry them again (Fry, Part (B)), until they're golden brown and crispy on the outside, but creamy sweet on the inside. Make sure you hit them with a pinch o' kosher salt when they're fresh out of the oil. And speaking of oil, I used coconut oil. And not just any coconut oil, cause I've tried a few brands now, and what you're about to see is by far the best, cleanest tasting oil I've tried yet:We're just about out of this stuff, and that makes me sad because it's so good I think one of the ingredients is "unicorn tears." We get it from this place, which looks to be a home-school family that keeps to themselves in Northeastern Minnesota, and spends their time reading about alternatives to the normal American diet that won't kill you. I imagine they're fans of Ron Paul too. My kind of people! I could say a lot about coconut oil, but suffice it to say that it's a saturated fat that is good for you, unlike what you may have heard from the food police/government. Read up on the Wilderness Family's site if you're interested. Or read this book if you're a true glutton for punishment. Yes, I read that book.

And yes, I realize that I quit numbering the steps it takes to make these things. I got tired of counting. You'll be okay.

Anyway, this is what you'll have at the end:
I'd suggest one plantain per person, cause I always make one for the both of us and end up coveting the wifey's share of the wealth. Oh yeah, they're right tasty with mango habanero hot sauce, too.

Wednesday, July 9, 2008

Cap'n Shrimpy's Butterflied Shrimp

There's a man at the farmer's market that we know only as "Cap'n Shrimpy," and that we only call him to each other- never to him. He sells the best shrimp in town. There's another fish market that sells shrimp, but going into that place is like entering a parallel universe similar to the one in which elves are doing photo shoots outside my back patio. It's not a place I'm entirely comfortable in.

Anyway, for 7.50 a pound, the Cap'n will sell you these guys right here:For free he'll tell you how to butterfly them and grill them. And so will I. Check it out:


But I'm getting ahead of myself. First you have to tend to the garlic butter. Get yourself two cloves of garlic.Give them a rough dice, and then throw a pinch of kosher salt on them. We're making a paste.Now take your chef's knife and spread it across the cutting board for about ten good passes- it'll go something like this:What you now have, my friends, is gold. Put that gold, along with a stick of butter (for two people, that is) in a saucepan and get it all going at medium-low. Start this part before anything else so the butter can get right for about 20 minutes, then strain the garlic out, along with the other solids from the butter, and split it in two. One part is now to be brushed on during cooking, and the other is for dipping. We also used the mango-habanero hot sauce for dipping, and it was really, really good.

Now, back to the shrimp.

When you get 'em all prepped, they should look like this:I keep them on ice until the moment they hit the grill. I get like that sometimes.

Preheat your grill to "super-hot." Add shrimp. Baste.
It only takes about 3 minutes from the moment these bad boys hit the grill until you take them off. The shell protects them for burning and adds flavor. When they turn opaque, take 'em off and stack 'em up like gold ingots in Fort Knox.
Oh yeah.One last step for this Tex-Carib feast- put on the appropriate tunes. On vinyl if you have it.

And I do.
Enjoy. And I'll see you soon.


Tuesday, July 8, 2008

A Word on Hot Sauce

I love me some hot sauce. I've made about a dozen variations of the kind the Taco Lady behind the farmers' market in Houston always had on hand to doctor up her delicious tacos al pastor, which were my favorite. It involves a couple of varieties of dried peppers and some soaking, simmering, and blending along with some other ingredients. It's hard to mess with it too much though, when you can buy Cholula at just about any southern grocery store.

Cholula, for the uninitiated, is all you really need to know about hot sauce. It's the same color as most of the orange grease that comes with chorizo, barbacoa, and some of the other staple meats of true behind-the-farmers' market taco stands. The ingredients are simple, too: peppers, spices, vinegar. How can you go wrong?

I love you, "spices."
Nevertheless, I get my hankerin's for something a little different sometimes. And that brings us to another tasty Tex-Carib recipe experiment.

A frequent player in the Caribbean/Tex-Carib lineup of ingredients is the habanero pepper. It looks like this:
That is to say, they look like that.

Recently, Cara and I got a Bobby Flay video on Netflix (what? Is that weird?), and he made a mango-habanero hot sauce. What I present to you now is exactly that, but with my witty banter to make it different. And I had to use a different type of vinegar for half of the vinegar needs, and I'm sure that made mine far superior to Bobby's. Yeah. That's right.

Here's what you need:
In English, that's two habaneros, two mangoes, a small sweet onion of some kind, white wine vinegar (and rice wine vinegar too, I ran out of white about halfway through), two cloves of garlic, and olive oil (Flay used canola I think, so there's another difference!).

Butcher your mango. I slice the peel off all over, then carve big chunks of fruit off the oblong shaped pit. I had about this much, keeping in mind that my hand is the size of a tennis racket:Just kidding about the hand size, of course.

I coarsely chopped the onion, galic, and peppers, and threw the whole enchilada into a sauce pan with half a cup of white wine vinegar, and half a cup of rice vinegar, and a pinch of salt. I also simmered it for 15 minutes, but I'm getting tired of talking in the past tense. I'm living for the now, baby!

Put it all in a blender.Blend. If it's too thick, add some hot water or a little more vinegar. Mine was fine as it was.The cool thing is the heat hits you first with this stuff, with a sweet mango finish.

Next time I'll show you what we had with it. There is even a bonus instructional video included in the price. Can't beat that.

Oh, yeah- I typed "Tex-Carib" into Google yesterday to see if that term is already being used, and this site came up on the first page. Sweet!

Sunday, July 6, 2008

Tex-Carib Lives!

I've really been thinking a lot about the culinary mindset I'm bringing back from Haiti. The ideas I'm getting, and already playing with, aren't going to get me a Nobel prize or anything, but they're fun, gosh darn it. It's kinda like the things I already like to cook and eat, but a little different. Different peppers, spices (or spice combinations), and ingredients (plantains, mangoes). But much of the technique involves things that land squarely in my arena, such as grillin', chillin', and fryin'.

Okay, so chillin' is not a technique, but it is a necessary mindset to Tex-Carib cookin'. So is ending an inordinate amount of words with apostrophes. Yo.

First up- the Haitians were selling corn, that they apparently grow in their yards or any other square foot of soil they can find, hot off the grill. A grill in Haiti, mind you, is really a grate laid across some bricks with some burning wood or charcoal underneath. Like camping, but on a sidewalk. In a city.

So how do you make sidewalk grilled corn Tex-Carib grilled corn? You experiment to make it better than the original.

Corn Three Ways- The Experiment

The corn I saw being grilled was all shucked and getting caramelized over the fire. I've always grilled my corn in the husks so they steam some too, but it's always taken a while to cook that way. So what we did was take three ears, and prepare them three different ways. One all the way shucked, one partially, and one just a wee bit. All of the shucks were rolled back and the silks removed before cooking.

The Results:
Nice picture, ain't it? You should click on it to see it full sized.

Here's the breakdown: the un-shucked ear tasted great, until we tasted the next one, and then the next one after that. The steaming action of the shuck made the corn taste "cornier," which we liked better. The solution? Grill it all with the shuck on, then remove the shuck and throw it back on the heat for a minute to get the sweet caramelized nuggets of brown.

I'm not saving the world here- I just want the grills of said world to yield tastier food. You know, in case I come over to eat. Come back soon for some Tex-Carib classics such as mango-habanero hot sauce and Cap'n Shrimpy's butterflied grilled shrimp, which make this corn look like a side dish.

Friday, March 21, 2008

Spring Break Breakfast

Another quarter is behind me- five down to be precise. Today I woke up free of concern about final exams. This made me hungry. It also just so happens that the morning light is the best around here for food pictures, so you get to see how I make what we often call the "bird's nest." Start by peeling and then grating a large russet potato. Squeeze some of the excess moisture out of it with some paper towels and then season with salt and pepper.
The scallion will make its contribution later. While you're making your coffee or tea (green tea for me, please), heat up a dutch oven, cast iron skillet, or even non-stick pan to medium low or so. I put my range top on three and a half, but like my bass amp, it goes to 11. Fill it with copious amounts of butter. And please- use real butter. It's what Mary says, and Mary knows her fats.

Next, heap half of your tater pile into the heated vessel of your choice. Then make it look more or less like a circle, or whatever shape you decide upon. There is lots of room for individual expression here. I'm a circle man:
The morning light doesn't quite spread its warmth to the bottom of the pan in this case, but you get the idea.

Now for the hard part- walk away for about five minutes. Leave it alone. Let it get crispy.

Then flip it and repeat. Then put it on a plate and take a picture. It should look like this, but with your plate, not mine:
You should have enough to make another one. Do it. The grated taters don't keep, and your spouse won't be happy when you go eating breakfast without them. Everyone wins, except the tater. This gets called "The Bird Nest" because we always throw an egg on top, and today we happened to have a just-oh-so avocado on hand. The final product looked like this for about three minutes:
It was all then appropriately hot sauced, and consumed with passion. See you at the gym!

Sunday, January 6, 2008

Chicken! Prunes! Brandy!

Apparently, we now have a subscription to Bon Appetite magazine. Neither Cara nor I remember subscribing or anything, but it showed up in the mail box all the same. We did have some old airline miles that may be playing a role in this, but whatever.

I once looked through a Bon Appetite in a waiting room or some such, and I remember not knowing what any of the ingredients were- it was a all so darn fancy. Shallots? Demi-glace? Huh? Of course, that was a long time ago, before my freakish cooking obsession really hit hard. Now I'll have another source of inspiration to share with you- my primary source, by the way, is Cook's Illustrated, which is the best cookin' magazine around. No, really.

Anyhow- I know many people think prunes are something old people eat to stay regular. Some have begun to call them "dried plums" so people will know what they actually are- and you like plums, don't you? You could make this without them, but that would be a mistake.

First, open a bottle of brandy. For all my church friends reading this that means you'll have to go to a liquor store. Liquor stores are often closed on Sunday, by the way. I always realize this on Sundays when I need some liquor, but that's another post altogether.

There is probably a brand that would be the best for this recipe, but since I know very little about brandy, I just bought something in the mid range in price- the recipe in the magazine called for "Armagnac," which after doing some "research" (thanks, internet!) I have discovered that, yes, Armagnac is expensive, fancy-pants brandy that they probably wouldn't sell at Walgreen's Liquors here in town. As a matter of fact, I know they don't. They do sell about ten kinds of cheap brandy, though. I got E&J for no real reason. It worked fine.

I really more or less looked at the picture in the magazine and skimmed the recipe than copy it exactly, by the way. I did, as the recipe says, boil the prunes (I used about eight of 'em) in 1/3 cup of brandy until the liquid was absorbed.

I then broke out my sweet buffet casserole braiser and browned four chicken thighs skin side down (after I had salted and peppered them that is- kosher salt, please).
Before: After:
They're not all the way cooked yet or anything- the skin just needs some alone time to get lookin' that good. Next- I poured out a little bit of the accumulated fat (not much), and threw in the freshly peeled shallots:
The goal here is to get 'em all browned and delicious. Like this:
Next, you've gotta deglaze the pan with some more (1/3 cup) brandy- this means pour it in and get to scraping the fond (brown stuff stuck to pan) up to make the sauce rich and delicious. Like this:
Now you're in the home stretch. Just add the chicken back to the pan with a little thyme, and about a cup of chicken stock, and put the lid on as it simmers away for about half and hour.
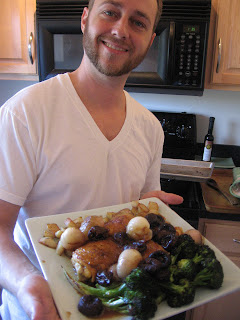
After the chicken was cooked through I took it out, and added a dash of white wine vinegar (the recipe said sherry wine vinegar, but I didn't have any). I reduced the sauce for a few minutes and poured it over the chicken. in the mean time I cooked up some broccoli and taters. It looked like this at the end:
Here's the picture from the magazine and my version side by side:
So, to sum up you need:
brandy
chicken
chicken stock
shallots
prunes
thyme
salt and pepper

And the secret ingredient:

Love

In other news, I just had my first ever political telephone poll. Go Ron Paul!